3. How to make a Finishing Paddle
Step One: Gather your Materials

- A Flat Board - I used MDF board, because that board is already nice and flat. Your board needs to be as flat as possible in order to perform properly. I used ½” thickness.
- Sandpaper - You’ll need sandpaper to smooth out your cuts, and to be certain that your board is as flat as possible. The pictured sandpaper is 80 grit, but you’ll want at least 220 grit on the final surface.
- Leather - The most important part of your finishing paddle. A hard, untanned leather is preferable. I got a bag of leather scraps from Michael's for around $8.
- Adhesive - You’ll need to secure the leather to the paddle with adhesive. I used an epoxy, but you can use a standard yellow glue. Do not use Super Glue, it will soak through the leather and create hard spots. If not spread evenly, Gorilla glue and Hot glue can create lumps under your leather, so I’d steer away from those if possible.
- Compound - A compound is not really necessary, but it takes it that extra step. If you are going so far as to make your own finishing paddle you might as well get the compound as well. Any sharpening company, Home Improvement stores, Walmart, or Amazon will sell stropping compounds.
Tools
- Ruler, pencil, eraser are all helpful
- Saw - I used a jig saw, but any saw that gets it cut out works.
- Clamps - Optional - I used clamps when the epoxy was adhering the leather and board together, but you could easily just stack something heavy and flat on top of it as it dries.
- Palm Sander - Optional - I used a palm sander just to make sure everything was as flat as I could get it.
Step One: Draw, cut, and level your board.
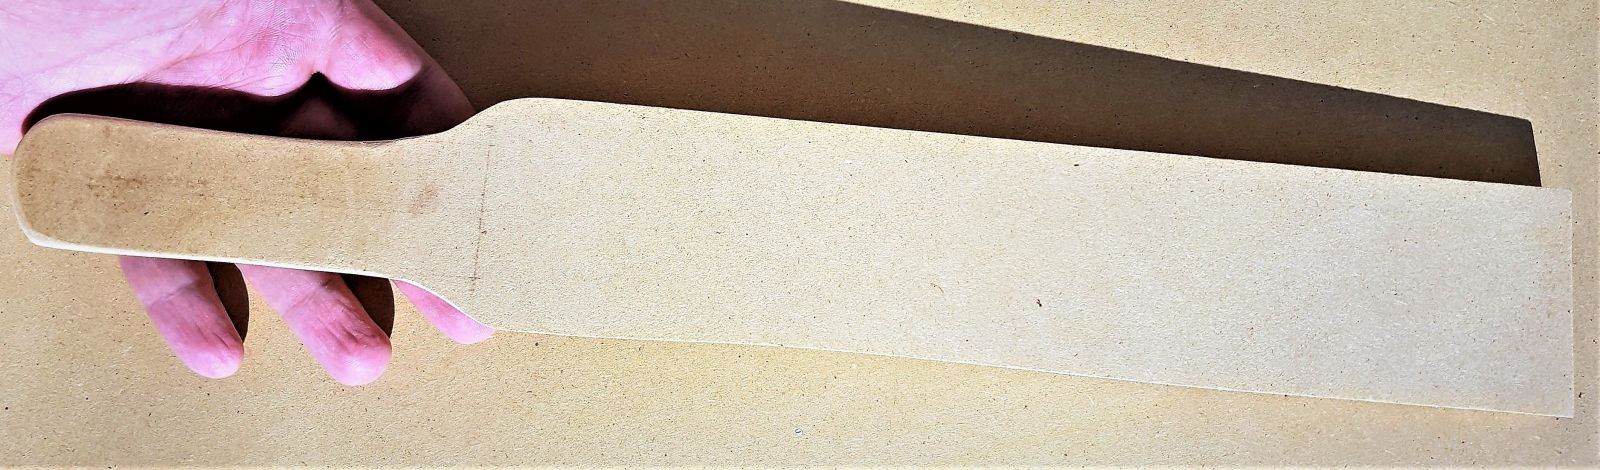
It is very important that your board is level, so that while you are stropping your knife the edge is aligned correctly. The size will depend on what kind of knives you want to be able to use it on. It could be small and pocket sized, or it could be much bigger to accommodate larger knives.
I knew I wanted to be able to strop kitchen knives so I went for a larger size. The surface area of the leather on my paddle is 11-½ ” long by 2-½ ” wide. With the handle it is 16-¼” long.
Adding a handle is optional, but sometimes it can come in handy. Some folks add a lanyard hole to the handle so they can hang their finishing paddle from the wall when not in use.
Leveling your board - I used a palm sander with 220 grit to just give it that extra level of smoothness. If your board is not made of MDF and needs leveling you can adhere some 100 grit sandpaper to a flat surface and run the board over that until completely flat. After that I might touch it up with some higher grit sandpaper.
Step Two: Cut and glue your leather
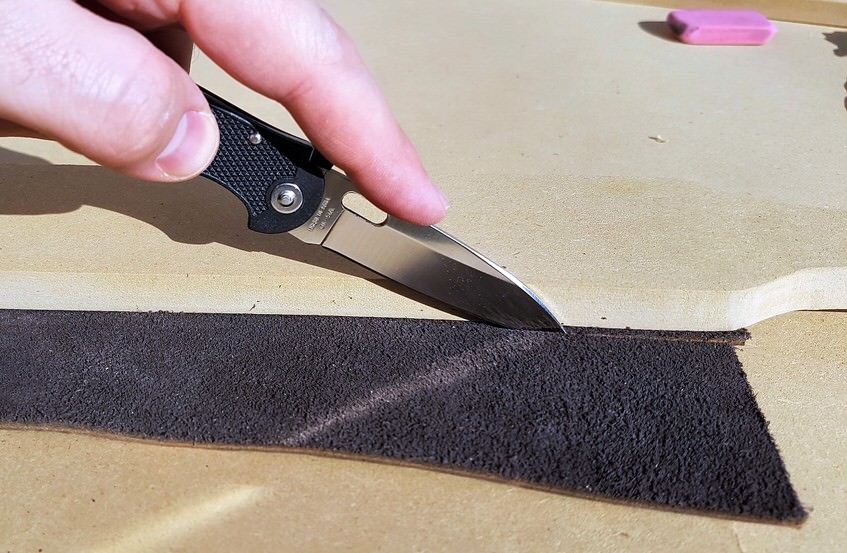
I cut the leather just a little bit bigger than the surface area I wanted it to cover, to allow for any mistakes. Make sure to use a sharp knife to cut your leather.
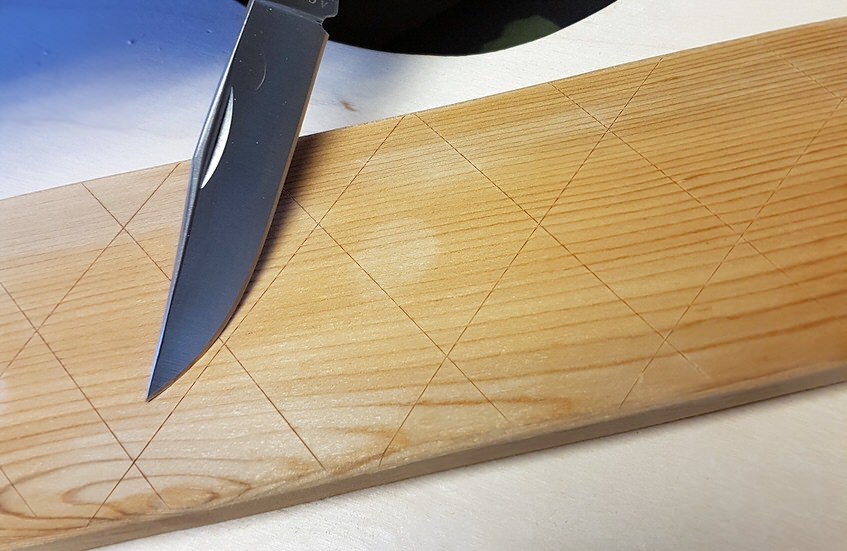
Next I cut some grid lines into my board. This gives the adhesive something to grab onto. Then I spread the epoxy (or other adhesive) onto the board using a popsicle stick to ensure even spread. You do not want any lumps in your epoxy to effect your leather.
After that I put the leather onto the glue suede side down. On top of the leather I placed another flat board, and then clamped the two boards together to ensure the leather dried as flat as possible. Alternatively, if you don’t have clamps, you can place a large, flat object on top, make sure it covers the whole leather piece, and place weights on top of that.
.jpg)
Step Three: Sand the leather
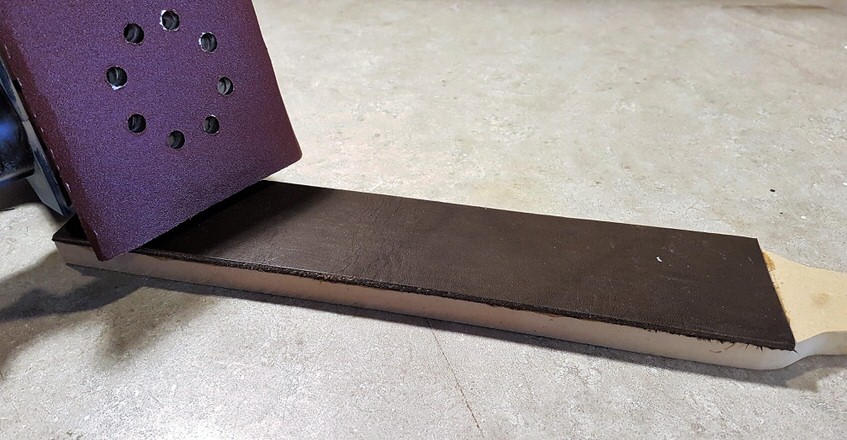
Next I took some 220, 400, and then 600 grit sandpaper and sanded the leather strip, just to be certain it was 100% flat. Sanding may or may not be necessary depending on your leather. I used a palm sander, but whatever you use to sand, you need to be sure that it's also level so that you are getting the desired effect. I didn't sand very vigorously, the goal is a flat surface, not to remove material.
I also took the opportunity to cut the leather exactly to size - remember earlier we cut it slightly larger than we wanted it.
After sanding it down I took a slightly damp cloth and wiped the whole thing free of dust. Then let it dry.
Step Four: Light coat of Mineral Oil
.jpg)
Next I cover the whole finishing paddle in Mineral Oil. The mineral oil will prepare the leather for your honing compound, as well as protect your wood. Mineral oil only needs to be put on once.
After that I wipe the whole thing down and let it dry.
Step Five: Applying the Compound
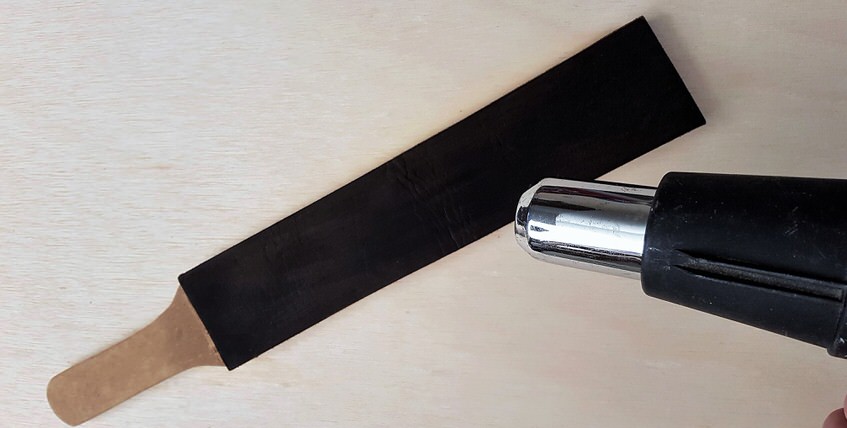
Before I apply the compound, first I take a heat gun or a blow dryer and warm up the leather a bit. Your goal is to warm up the leather, not dry it out. Do not overdo it with the heat gun, you can inadvertently ruin your leather. Do it just enough so that the leather is warm to the touch. This prepares the leather to receive the compound, and opens up the pores a little bit. Compounds are made of some sort of very fine grit embedded in a waxy compound. The warm leather will heat up the wax a little bit and help it smooth over onto the leather easier. I got this tip from Sean Slaughter.
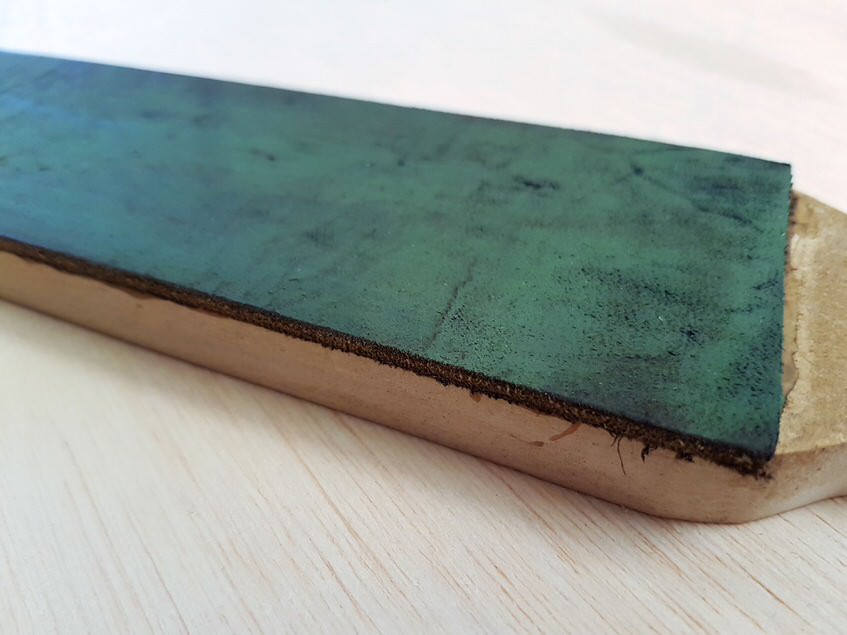
A little comound goes a long way - you really don’t need that much. On the other hand, compounds last a VERY long time, and they aren't very expensive. I decided to go fairly heavy with mine, as you can see the entire piece of leather now has a green sheen on it.
Voila - All done!
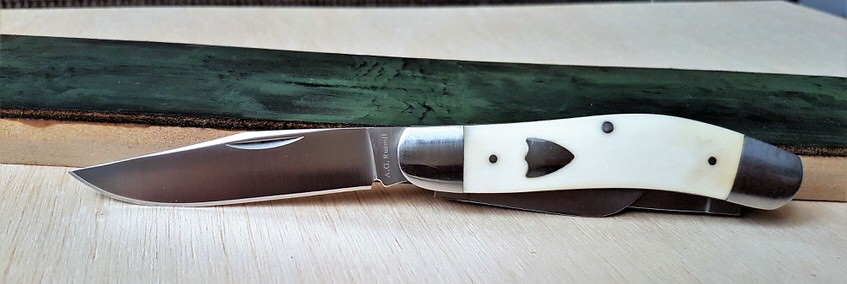
Now you are ready to use your finishing paddle and get those razor edges! If you want to go the extra mile to get a mirror finish on your blade edge, you’ll want to make a different paddle for each compound. Mixing compounds will get you mixed results.
Double Sided Finishing Paddle
One thing you can do is make each finishing paddle double sided by adding leather to both sides of your board. That way you can have a different compound on either side, and you have one less board to cut out. But if you do this, be careful what you lay your paddle down on, it will pick up metal filings, sawdust, and other unwanted detritus.
I like the doubled sided finishing paddle when I’m stropping without compounds, so I have access to the hard leather side, and the suede side of the paddle. But when it comes to compounds, I prefer to just have it one-sided and make a few extra finishing paddles. To me it is worthwhile so I don’t have to worry what I lay the paddle down on.
When to Use a Finishing Paddle
1. Maintaining your edge. Especially important with straight razors.
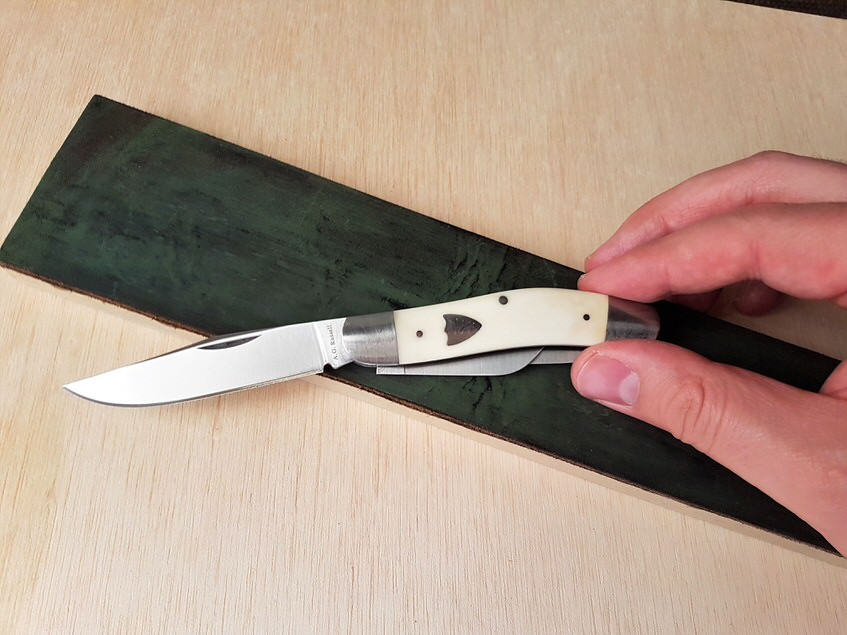
A finishing paddle is foremost a maintenance tool. You can use it to maintain your knife’s edge to keep it sharp for longer. It does not actually sharpen the steel; stropping just realigns the edge to be straight. This is especially important for maintaining straight razors. This is a common misconception about strops as well as most sharpening steels. If the blade is already dull, a strop will not bring it back to full sharpeness.
This is why I typically prefer using my Ceramic Rods as my primary maintenance tool, because it will actually remove steel and sharpen the blade. Of course, even ceramic rods are not full proof, they remove steel at a much slower rate than a real sharpening device. Strops are great because they can take your sharpenness that one extra step. Your blades can do some amazing things properly honed and stropped.
2. Removing a Wire Edge.
When sharpening your knife on stones, your blade edge will develop a wire edge, sometimes called a burr. This is a thin strip of steel that has folding over the edge. The use of a finishing paddle will straighten that thin line of wayward steel into a straight line, removing the wire edge and making the blade razor sharp.
3. Polishing Your Edge.
The third main reason for using a finishing paddle is to polish your edge. Using a paddle, and different polishing compounds, you can make your edge shine. With the use of compounds, you can achieve the sharpest edges possible, and impress all your friends and do all kinds of neat knife tricks like splitting hairs. Another bonus to having mirror finished edges is that a mirror finish will help resist rust due to the surface being smoother and less likely to retain any moisture.
However, I have not felt the need to impress others in many years. In my younger years I worked very hard to achieve these impressive razor sharp edges to impress my friends, peers, and customers. But edges achieved through compounds and stropping are very thin, and do not last very long compared to the work it takes to achieve them. Nowadays I am happy with the Ceramic Rods as a last step in the sharpening process.
How to use a Strop
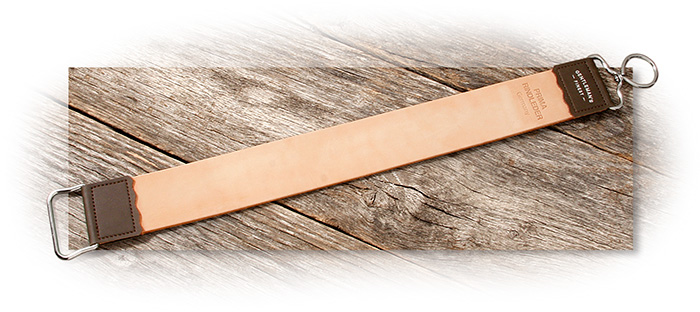
If you want to purchase a premade strop:
Leather Razor Strop - Full Details Product Page
Thanks for reading!
Written and edited by A.G. Russell III and Jake Broce. Last Updated July 9, 2018.