How To Hone & Sharpen Knives At Home With The V-Sharpener
Honing & Sharpening your knife is hugely important - a sharp knife will result in much fewer accidents and make life and especially cooking so much more enjoyable.
I’ve found the best sharpener for the everyday person is the V-Sharpening System.
A quality V-Sharpening System is:
-
Easy & Quick To Use
-
Lasts A Long Time
-
Stores Easily
-
Extremely Sharp Results
-
Doesn’t Eat Too Much Of Your Blade Steel
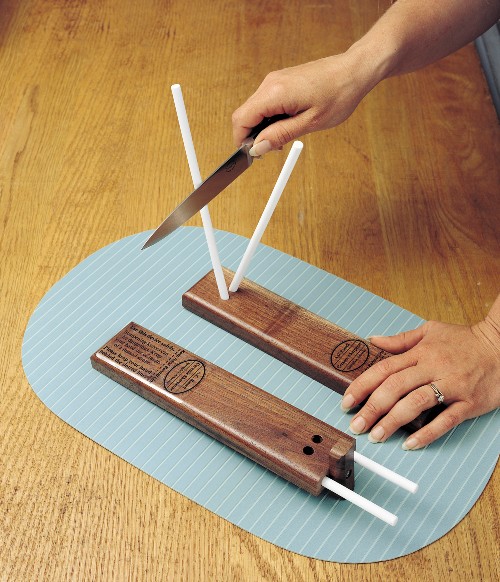
1. Set Up
Set the rods in place and the base on an even surface with good lighting. If you hold your knife straight up and down, it is cut in half to a 15 degree angle, which is our preferred angle for most knives.
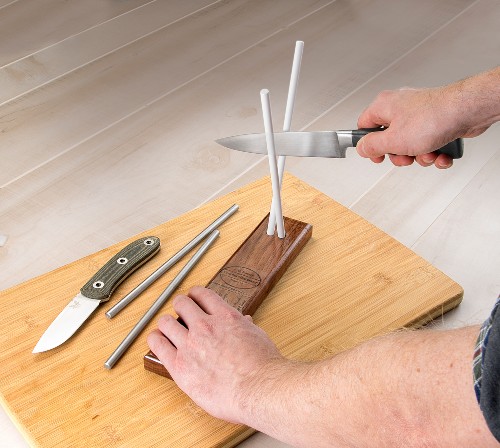
2. The Stroke
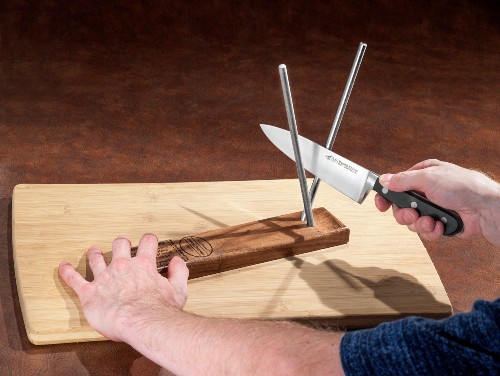
Hold your knife straight up and down.
Start on your dominant side (right handers start on the right side). Keep your other hand at the far end of the block and out of harm's way.
Start at the top of the rod, with the heel (back section) of the blade, and push down and pull back at a slow, even pace, keeping the knife vertical. Hold the knife with a steady pressure throughout the entire stroke.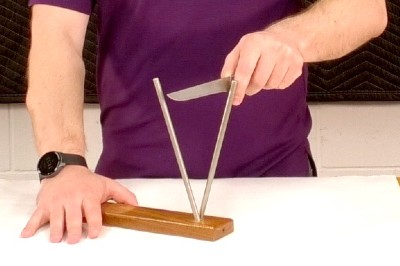
If your knife edge is rounded (is curved, or has a belly), round out the curve with your wrist - still keeping the blade down straight up and down.
Accurate results are more important than speed. Slow and steady wins the race.
Always keep the blade straight up and down. End your last stroke on the opposite side (right handers end on the left side).
3. Grits
These rods are essentially fine abrasives. Think of them like sandpaper. A coarse sandpaper removes material faster, while a fine sandpaper cleans up the scratches of the coarse one and smooths everything out.
Our diamond rods are a medium-fine grit. Start on the diamond rods if your knife is dull, then graduate to the Ceramic rods.
 Diamond Rods
The diamond rods are a medium fine grit, and will get you a toothy edge. Use a diamond rod for a dull knife.
The more pressure you use, the faster the diamonds will sharpen your knife. Use moderation though, too much pressure will scrape the diamond dust off your rod, shortening the lifespan of your rod.
For a dull knife I start with a medium pressure, and then I lighten the pressure as I try to even out the edge.
How many strokes you need will depend on how much material needs to be removed. If you find you aren’t making any progress within 40 strokes, you may need to increase the pressure of your stroke. Make sure to maintain even pressure throughout the stroke/length of the knife.
Diamond Rod Results - Your knife should make it to a toothy edge capable of at least roughly cutting paper. If your paper tears at a particular spot on your edge, focus on sharpening that section of the blade. Then even out the edge with full length strokes.
You should be able to look along the edge and see tiny scratches all along the edge. If you are using consistent strokes, all the scratches will be going in the same direction.
Ceramic Rods
If diamond rods are the medium-fine sandpaper, then ceramic rods are the very fine sandpaper. Ceramic rods are your finisher, and will produce a fine edge. They are also great for honing your knife, much better than fumbling with a kitchen steel.
Just like the diamond rods, start out with a medium pressure, and end with a lighter pressure. Your goal with the ceramic is to polish out the scratches caused by the diamond rods.
Honing - If you hone your kitchen knife every time you use it, 1-2 strokes per side will be all you need to keep it sharp.
Ceramic Rod Results - You should be able to glide easily through a piece of paper.
If you aren’t gliding smoothly through paper after 30 strokes, something along the edge isn’t quite right. You may need to focus on that area with medium pressure strokes, or sometimes you may need to return to the diamond rods to finish out a stubborn section. Work back up to the ceramic rods and try again.
4. Clean Up
After sharpening your knife, make sure to wash it before using it or storing it away. You don't want to ingest the tiny steel particulars produced by the sharpening process!
Eventually the steel dust will gunk up your rods, and slow down the sharpening. You can clean the diamond rods off just by rinsing it with water. 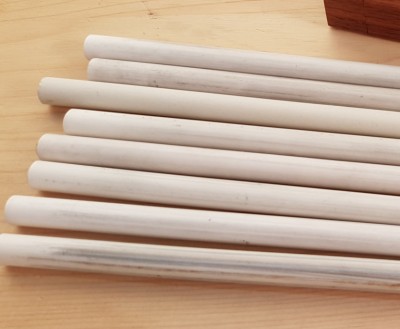
We recommend using a Rust Eraser over a trash can or some newspaper to clean the ceramic rods.
You can also use an abrasive cleaner like Comet to clean it, but make sure to dry your rods immediately and thoroughly. Pat them down with a paper towel and then let them air dry before returning them to your sharpening block.
Tips & Frequently Asked Questions
Angles - The First Time Takes Longer.
Nearly every knife gets its final sharpening by hand in the factory, so no two knives are quite the same. Most European kitchen knives are sharpened to a 20 degree for a more robust edge. Most Japanese kitchen knives are typically sharpened around 14-17 degrees. Angles will vary from brand to brand or even knife to knife.
The first time you sharpen your knife, it will probably take longer to sharpen it than it will next time as you adjust the knife angles to the sharpener. Our knives are sharpened to 15 degrees, and your sharpener is set to 15 degrees (30 total) - but because the final edge is sharpened by hand, even a knife sharpened to “15 degrees” may need slight adjustments to be in line with your own sharpening.
Limited Progress? Check Your Angle.
Your hand may not be steady, your technique may not be quite right, or your knife angle might not be quite 15 degrees. You can check this by coloring the very edge of your knife with a Sharpie. Let it dry, and then do a few test strokes. Wherever the sharpie is removed, that is the section that is getting sharpened. 
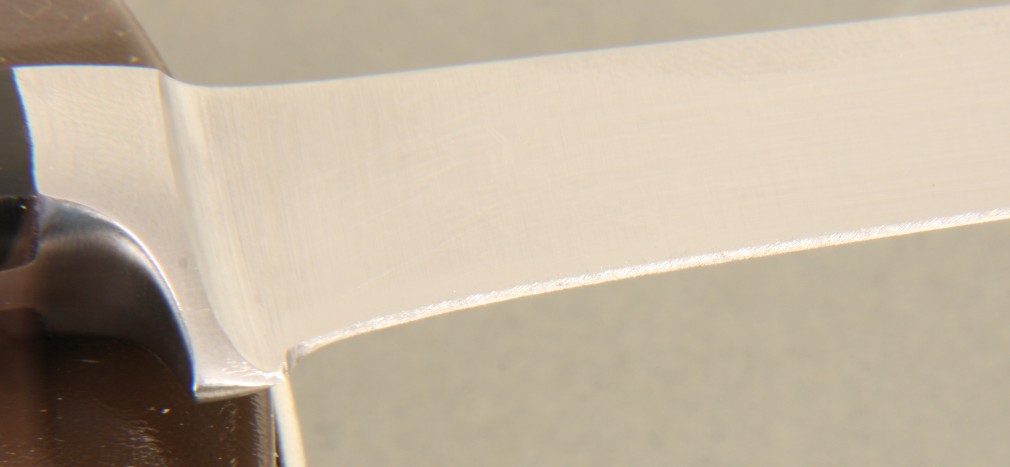
Chips in the Blade.
Check for chips in the blade by holding the edge so that light reflects. If you see shadows or missing pieces, you have a chip in the blade.
Chips in the blade are harder to fix than just normal sharpening. To remove them completely you have to remove steel up to the top of the chip. Generally I would recommend getting a knife sharpening professional to fix up your knife and remove any chips from the blade. That will be the easiest way to get it fixed. From there you can maintain your knife at home on the V-Sharpener.
Minor chips CAN be fixed with the diamond rod. The diamond rods are a medium fine grit however, so removing chips will definitely take some time. You’ll either have to be a bit aggressive with it or compromise. I recently sharpened a few blades for some friends and there were a few chips in the blade. Rather than eating away lots of the blade to remove them completely, I instead sharpened a fair amount and ground out most of the chips but not quite all the way. Hopefully with their reduced size they will act more as small serrations rather than interrupt the cut. If you compromise the chips need to be small enough that they won’t grow into bigger ones later.
The last option would be to graduate to a more aggressive sharpening medium. Sometimes pull through Tungsten Carbide sharpeners can be used to remove steel quickly. Be careful to use even pressure strokes, if you get the chip caught in the pull through it can exacerbate the problem. Another option is to find a more aggressive coarse stone. Both of these options will remove steel quickly so be careful as you go along.
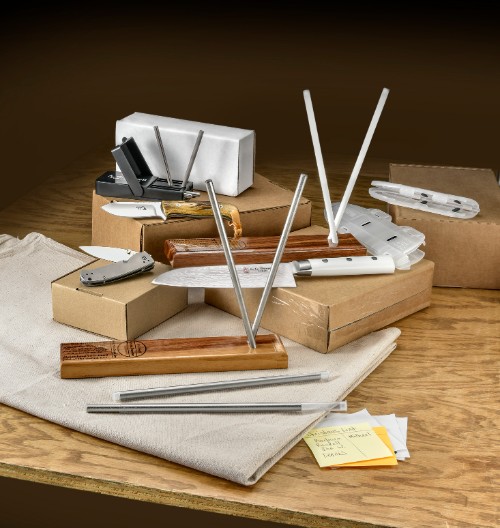
Available V-Sharpener Options:
A.G. Russell Ceramic & Diamond V-Sharpener with Walnut Base
Written 9/20/20 by Jake Broce